Save Money and Boost Health: Make Your Own Elderberry Syrup for Wellness
As the seasons change and cooler months bring their share of sniffles and aches, many of us seek natural ways to fortify our immune systems. While store shelves are stocked with countless remedies, one stands out for its centuries-old reputation and potent benefits: elderberry syrup. But did you know you can easily craft this powerful immune-booster in your own kitchen? Embracing a homemade elderberry syrup recipe is not only a fantastic way to support your family's health, but also a smart move for your wallet.
Elderberries, derived from the Sambucus nigra plant, have been revered across cultures for their medicinal properties. From ancient North American traditions to European folk remedies, these dark, potent berries have been a go-to for warding off illness. Today, modern science is increasingly recognizing their rich antioxidant profile, high vitamin C content, and impressive antiviral properties. Incorporating elderberry syrup into your daily routine, especially during flu season, can offer daily immune support, help ease flu symptoms, and soothe sore throats. Ditch the expensive store-bought versions and discover the simplicity and satisfaction of preparing your very own elixir with this comprehensive guide.
Why Make Your Own Elderberry Syrup? The Benefits of Homemade
Beyond the simple act of preparing a dish, making your own elderberry syrup is an intentional step towards holistic wellness. There are compelling reasons why this particular herbal remedy should find a place in your kitchen and medicine cabinet.
- Unmatched Health Benefits: Elderberries are truly a powerhouse of nature. Packed with antioxidants like anthocyanins, flavonoids, and phenolic acids, they help combat oxidative stress in the body. Their high vitamin C content is crucial for immune function, while their documented antiviral properties make them a formidable ally against common cold and flu viruses. Many users report that regular consumption of elderberry syrup can significantly reduce the duration and severity of cold and flu symptoms, making it an essential part of an immune-boosting strategy. For more on this, check out our guide on Homemade Elderberry Syrup: Immune Boost for Flu Season.
- Significant Cost Savings: A small bottle of quality elderberry extract from a health food store can be surprisingly expensive, often costing upwards of $20-30 for a limited supply. By purchasing dried elderberries in bulk, or even foraging them if you have access to a safe source, you can produce a much larger quantity of syrup for a fraction of the price. This makes daily immune support much more accessible and sustainable.
- Complete Control Over Ingredients: When you make elderberry syrup at home, you dictate exactly what goes into it. This means no artificial flavors, preservatives, excessive sugars, or unnecessary fillers. You can choose organic ingredients, use raw local honey (known for its own antimicrobial properties), and customize the spice blend to your preference. This transparency ensures you're giving your body only the best.
- The Joy of the Process: There's something inherently calming and rewarding about creating your own natural remedies. The aroma of elderberries simmering with warming spices fills your home, turning a simple task into a mindful ritual. It’s an empowering way to take an active role in your family's health and connect with age-old traditions of herbal medicine.
Essential Ingredients for Your Elderberry Syrup Recipe
The beauty of this elderberry syrup recipe lies in its simplicity. You only need a handful of accessible ingredients to create a potent and delicious syrup. Here’s a detailed look at what you’ll need and important considerations for each:
The Star: Elderberries (Fresh or Dried)
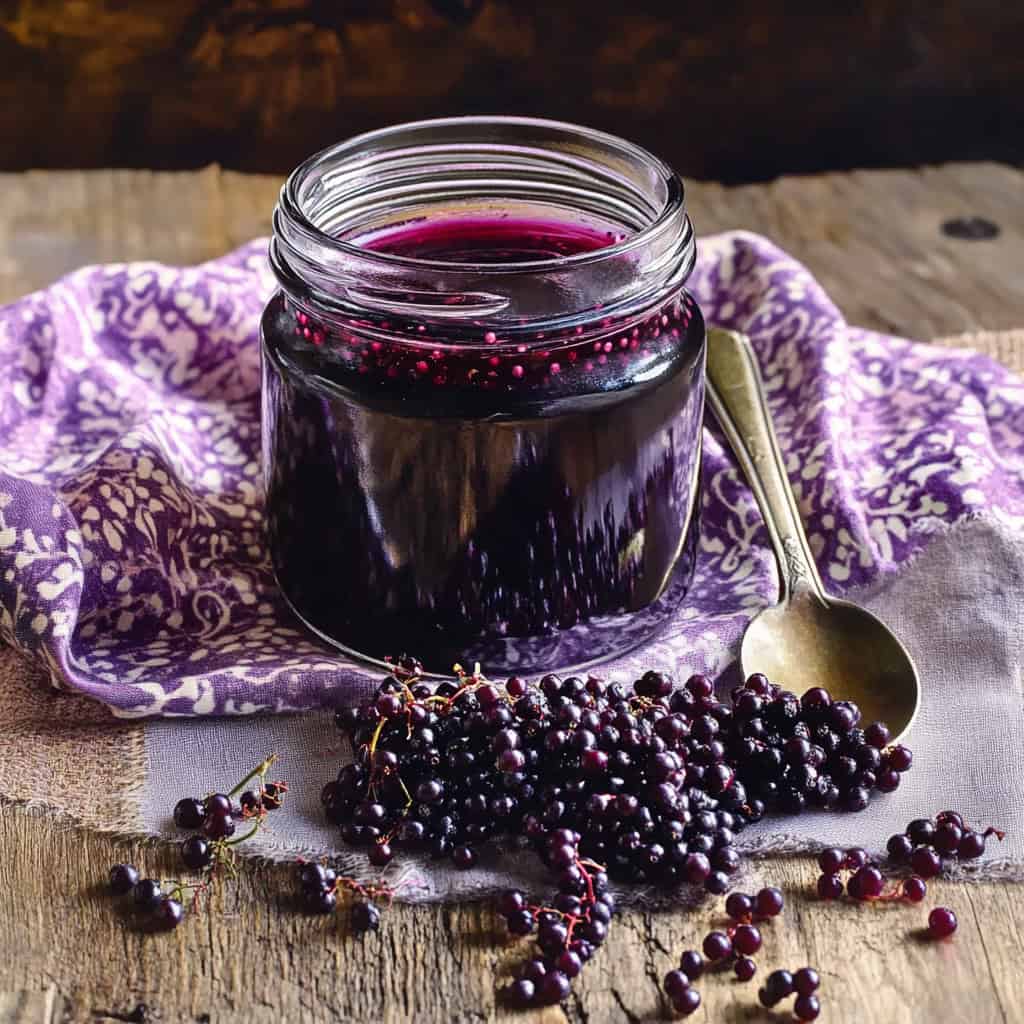
- Fresh Elderberries: If you're fortunate enough to have an elderberry plant or enjoy wild foraging, fresh black elderberries (_Sambucus nigra_) are wonderful. They should be deep purple-black and hang heavily in clusters, indicating ripeness. Avoid any green or red berries, as unripe berries, along with stems, leaves, and seeds, contain cyanogenic glycosides, which can be toxic if consumed.
- Foraging Tips: If foraging, be absolutely certain of your identification. Watch for tiny white worms, which are common in ripe clusters. A simple trick to remove them is to soak your berries in a large bowl of cold water with a small amount of salt for 20-30 minutes; the worms usually float to the top for easy skimming. Always carefully remove all stems before cooking.
- Dried Elderberries: For most people, dried organic elderberries are the most convenient and widely available option. They have a longer shelf life and are ready to use. As a general rule, 1 cup of dried elderberries is equivalent to about 2 cups of fresh elderberries in a recipe.
- Storage: Fresh elderberries don't store long. If not using immediately, spread them on a baking sheet and freeze, then transfer to a freezer bag. Dried elderberries should be stored in an airtight container in a cool, dark place.
The Sweetener: Raw Honey or Maple Syrup
The choice of sweetener not only adds flavor but also contributes additional health benefits.
- Raw Honey: Unpasteurized raw honey is a traditional choice, prized for its own antibacterial, anti-inflammatory, and antioxidant properties. It also acts as a natural preservative. Important Note: Do not give raw honey to infants under one year old due to the risk of botulism.
- Maple Syrup: For a vegan alternative, or if you're making syrup for infants over one year, Grade B or Grade A dark maple syrup is an excellent substitute. It offers a rich flavor and a good mineral profile.
Warming Spices and Water
These ingredients elevate the flavor profile and often add their own therapeutic benefits.
- Cinnamon: A cinnamon stick or dried cinnamon powder adds warmth and flavor, and is known for its anti-inflammatory and antioxidant properties.
- Cloves: Whole cloves contribute a pungent, aromatic depth and are traditionally used for their antiseptic qualities.
- Fresh Ginger: Sliced fresh ginger or dried ginger powder brings a comforting heat and is renowned for its digestive aid properties and ability to soothe sore throats.
- Filtered Water: Using filtered water ensures a cleaner, purer base for your syrup, free from tap water impurities.
Your Step-by-Step Elderberry Syrup Recipe
Now that you have your ingredients, let's dive into making your very own batch of homemade elderberry syrup. This method is straightforward and designed for success.
Ingredients:
- 1 cup dried elderberries (or 2 cups fresh elderberries, stems removed)
- 4 cups filtered water
- 1 cinnamon stick (or 1 teaspoon dried cinnamon)
- 4-6 whole cloves
- 1 tablespoon fresh ginger, sliced (or 1 teaspoon dried ginger)
- 1 cup raw honey (or Grade B maple syrup for a vegan option/for children over 1 year)
Instructions:
- Combine Ingredients: In a medium saucepan, combine the elderberries, water, cinnamon stick, whole cloves, and fresh ginger.
- Simmer Gently: Bring the mixture to a boil, then immediately reduce the heat to a low simmer. Allow it to simmer gently for about 30-45 minutes, or until the liquid has reduced by nearly half. You'll notice the berries becoming plump and the liquid deepening in color.
- Mash the Berries: Remove the saucepan from the heat. Using a potato masher or the back of a spoon, gently mash the elderberries to release their remaining liquid and beneficial compounds.
- Strain the Mixture: Place a fine-mesh sieve over a large bowl. Pour the elderberry mixture into the sieve, pressing down firmly on the solids to extract as much liquid as possible. Discard the spent elderberry pulp and spices (they can be composted!).
- Cool the Liquid: Allow the strained elderberry liquid to cool completely to room temperature. This step is crucial if you're using raw honey, as heating raw honey can diminish its beneficial enzymes and properties.
- Stir in Sweetener: Once the liquid is cool, stir in the raw honey or maple syrup until it is thoroughly combined and dissolved.
- Bottle and Store: Pour your finished elderberry syrup into clean, airtight glass jars or bottles. Store it in the refrigerator.
This recipe creates a concentrated syrup, ensuring you get maximum benefits from each dose. For another excellent method, check out our DIY Elderberry Syrup: Fresh or Dried Berries, Easy Recipe.
Storing and Using Your Homemade Elderberry Syrup
Once your delicious and healthful elderberry syrup is prepared, proper storage and usage are key to maximizing its benefits.
Storage:
- Refrigeration: Your homemade elderberry syrup, especially when made with raw honey, will last for about 2-3 weeks in an airtight container in the refrigerator. Always check for any signs of mold or off-smells before consuming, though this is rare with proper preparation and storage.
- Freezing for Longevity: If you’ve made a large batch or want to extend its shelf life, elderberry syrup freezes beautifully. Pour it into ice cube trays and freeze until solid. Once frozen, transfer the cubes to a freezer-safe bag or container. This allows you to thaw small, single-serving portions as needed. Frozen elderberry syrup can last for up to 6 months.
Usage Suggestions:
The beauty of homemade elderberry syrup is its versatility. You can take it straight or incorporate it into various drinks and foods.
- Daily Immune Support: Many people take a small dose daily during cold and flu season as a preventative measure. A common adult dosage is 1 tablespoon per day, while children (over one year old) might take 1 teaspoon daily.
- During Illness: If you feel a cold or flu coming on, increase the frequency. Adults might take 1 tablespoon every 3-4 hours, and children (over one year) 1 teaspoon every 3-4 hours, until symptoms subside. Always consult with a healthcare professional, especially when considering dosages for children or if you have underlying health conditions.
- In Drinks: Stir a spoonful into a warm cup of herbal tea (let the tea cool slightly if using raw honey to preserve its benefits), blend it into a smoothie for an extra health boost, or mix it with sparkling water for a refreshing, healthful drink.
- With Food: Drizzle your elderberry syrup over pancakes, waffles, yogurt, or oatmeal for a delicious and nutritious topping.
Embrace Natural Wellness with Your Own Elderberry Syrup
Making your own elderberry syrup is more than just following a recipe; it's an investment in your health, a step towards self-sufficiency, and a delightful culinary experience. With its rich history, proven benefits, and the satisfaction of creating something wholesome with your own hands, this elderberry syrup recipe empowers you to take control of your wellness journey. So, gather your ingredients, savor the aromatic process, and enjoy the peace of mind that comes with a potent, homemade immune-boosting elixir. Your body (and your wallet) will thank you!
